Setting Up and Running the
openVA Pipeline
Quick Demonstration
Once Python3, Java, R, and openVA have been installed on your computer, there are only a few steps needed to install and demonstrate the openVA Pipeline.
Start by opening a terminal and changing to the directory that will serve as the working directory for the openVA Pipline. The working directory for this example will be a folder called Pipeline located in the user’s home directory
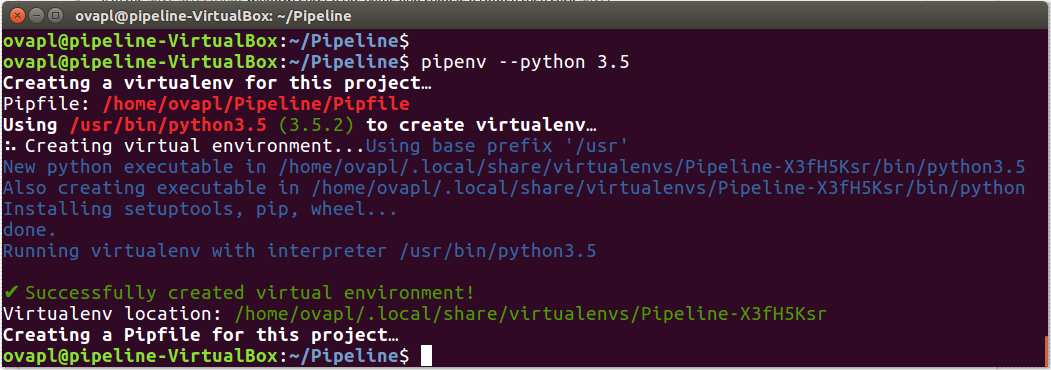
$ mkdir -p $HOME/Pipeline
$ cd $HOME/Pipeline
$ pipenv --python 3.8
The last (recommended) step uses Pipenv to create a virtual environment for the pipeline, which should look like the following screenshot
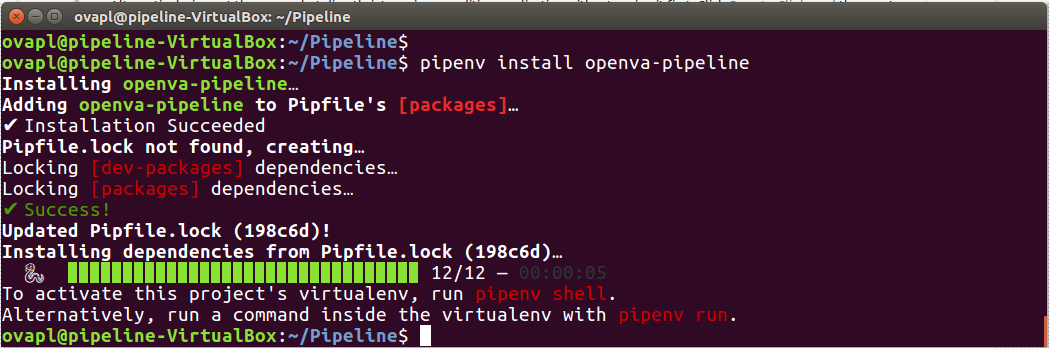
Use Pipenv to install the openVA Pipeline package from PyPI
$ pipenv install openva-pipeline
After this command, the output produced by Pipenv is shown in the following screenshot
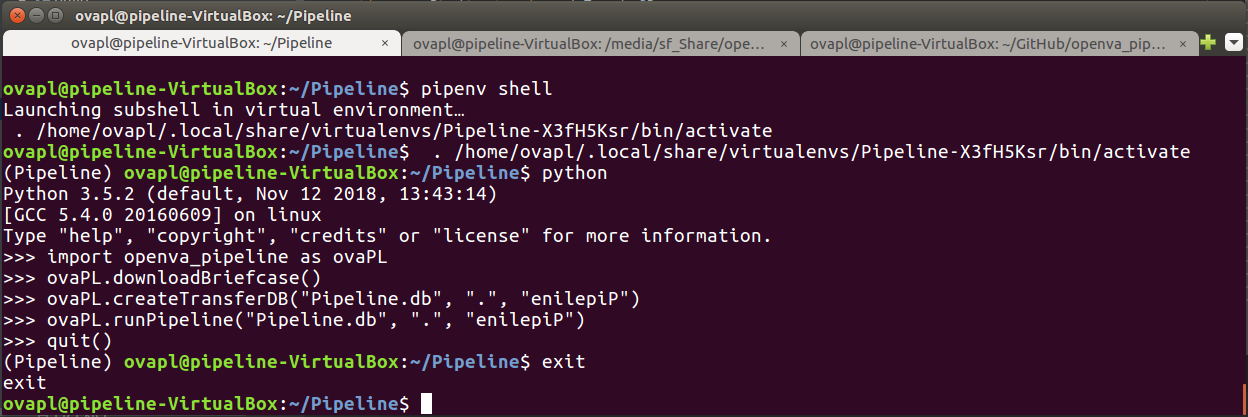
Open a Pipenv shell load the openVA Pipeline package, download the ODK Briefcase, install the Transfer database, and run the Pipeline. The final command exits out of Python.
$ pipenv shell
(Python commands…)
>>> import openva_pipeline as ovaPL
>>> ovaPL.downloadBriefcase()
>>> ovaPL.createTransferDB("Pipeline.db", ".", "enilepiP")
>>> ovaPL.runPipeline("Pipeline.db", ".", "enilepiP")
>>> quit()
Here are a few more details about each Python command…
import openva_pipeline as ovaPL– load the openVA Pipeline package and use the shortcut name ovaPL. To access the tools inside the openVA Pipeline package, use the nickname, followed by a., and then the name of the function or class.ovaPL.downloadBriefcase()– call the function that downloads the ODK Briefcase app (version 1.18.0) from the ODK GitHub page. The app will be downloaded to the current working directory.ovaPL.createTransferDB("Pipeline.db", ".", "enilepiP")– create the SQLite database that contains the configuration settings for the Pipeline, stores VA data and results, and includes an event/error log. The arguments are: (1) the name of the Transfer DB file (“Pipeline.db”); (2) the path to the directory where the DB file will be created; and (3) the key for encrypting the DB. The default settings point the Pipeline to an ODK Aggregate and DHIS2 server hosted by the SwissTPH.ovaPL.runPipeline("Pipeline.db", ".", "enilepiP")– run each step of the Pipeline: download records from ODK Aggregate; run openVA to assign causes of death; store the results in the Transfer DB; and post the VA data and assigned causes of death to a DHIS2 server (with the VA Program installed). The arguments are (again): (1) the name of the Transfer DB file (“Pipeline.db”); (2) the path to the working directory for the Pipeline (the ODK Briefcase file and the Transfer DB need to be located in this directory); and (3) the key for encrypting the DB.Note
runPipeline() has fourth parameter export_to_DHIS with a default argument of True. If you do not want to post VA events to DHIS2, then pass a value of False, i.e. export_to_DHIS = False.
quit()– exit out of Python.
A demonstration of these commands is shown in the following screenshot.
Once the
runPipelinefunction has completed, we can check the results in several locations. First, let us take a look in the Pipeline’s working directory.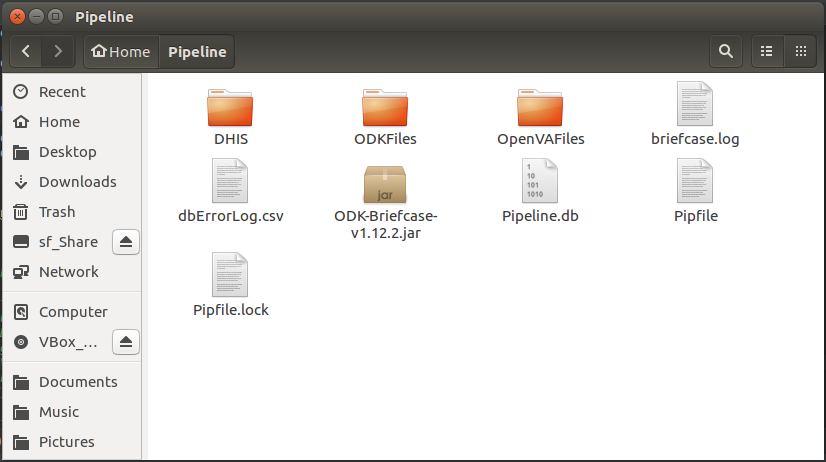
We can see folders where the files associated with the ODK Briefcase export and downloaded records (ODKFiles); the R script and log files from openVA (OpenVAFiles); and the files containg the VA events posted to the DHIS2 VA program (DHIS). The working directory also contains the ODK Briefcase jar file (and log file), the files generated by Pipenv (that keep track of the packages and dependences for our virtual environment); and another file dbErrorLog.csv which contains error messages for the Pipeline when it is unable to connect to the Transfer Database. If we take a look at dbErrorLog.csv, we see it is blank and thus the Pipeline was able to connect to Pipeline.db.

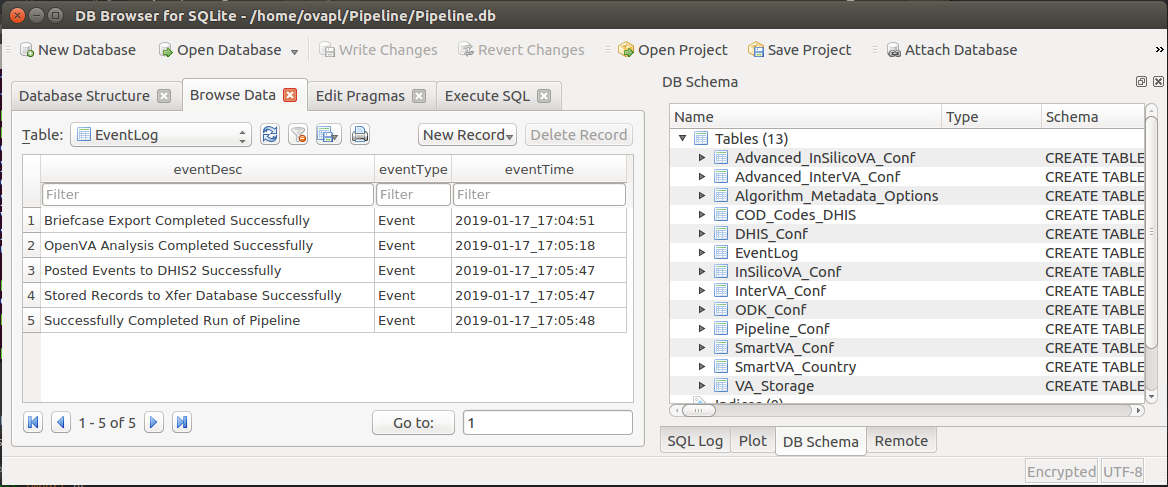
Finally, if we look at the EventLog table in the Transfer database, we see that each step of the Pipeline was successfully completed (along with the date and time when it finished).